|
t r a v e l s n a p zT r a v e l t h e w o r l d f o r j u s t a f e w c l i c k s |
||||
Guestbook |
Digital Tips from Travelsnapz.com |
|||
Site Links: |
Digital Darkroom - Old Masters' TechniqueYou can use an old masters' technique on your landscapes to give them a bit more life and depth. This technique involves changing the hue of the foreground, midground and long distance areas. Simplisticly, the foreground area of the scene is given a bit more green, the mid-range a bit more red, and the distance objects more blue. The old masters did it in paint, but you can do it in your digital darkroom. This technique is fairly simple to accomplish in Photoshop or Paint Shop. You just select the area you want to change (I usually do it with a fairly wide feather - say 30 pixels) and then just bring up the channel mixer to alter the hue. |
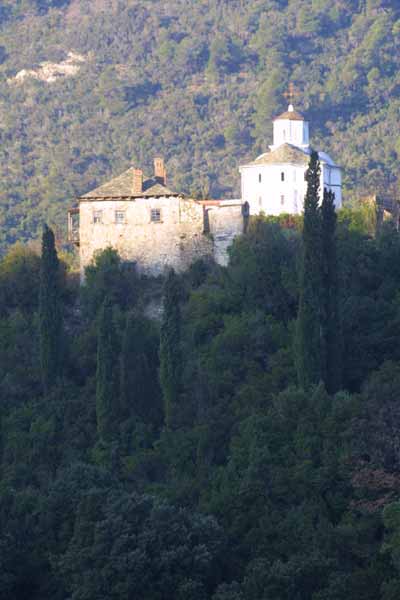 |
The original image taken on Mt Athos in Greece. The exposure of the foreground is not satisfactory because I wanted to get the exposure of the monastery buildings right. So the first task is to select the foreground and lighten it off a little. |
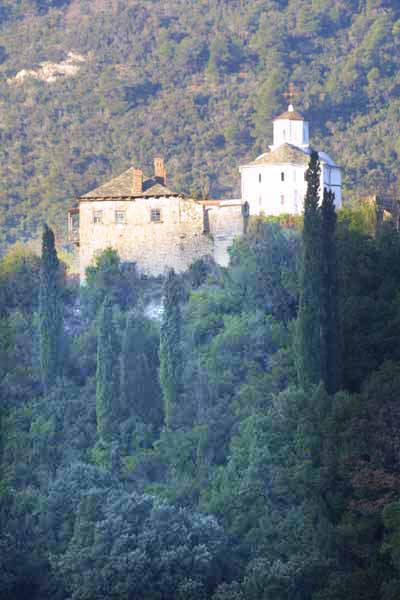 |
Now that the foreground has been adjusted with a levels adjustment, you can look at what areas to select for your colour adjustment. Note that in this image and the one below, I have left the right hand third of the image as the original to give you a better idea of how the technique works. |
|
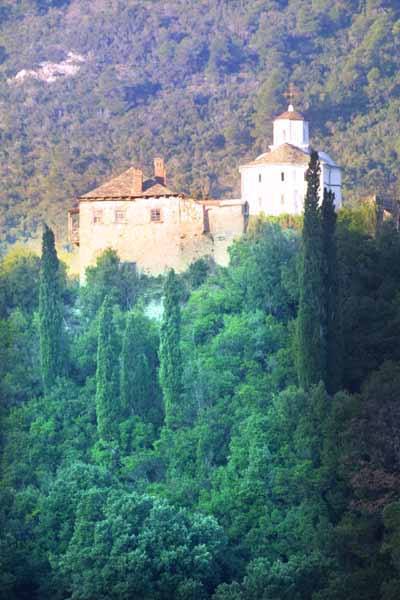
In this image, the foreground was selected and, using the channel mixer, I selected the green channel and increased the green from 100 to 120. I then selected the mid-range area (the area around the monastery buildings) and increased the red in the red channel from 100 to 120. Then I selected the distant area and increased the blue in the blue channel. The blue works better if you are changing the colour of distant mountains, but what I have done with this scene will give you an idea of what the technique can achieve.
I hope you can see the increase in depth by comparing the left hand two thirds of the scene with the right (untouched) third. When you try this technique, be subtle and play a little with the other colours in the channel mixer. Remember that the human brain is able to distinguish over two hundred shades of white, so don't be too dramatic in the changes you make. The idea is to experiment to see what suits your scene the best. |
We can learn a lot from studying the techniques the old masters used, so next time you go to a library, why not get a Renaissance painting book rather than a photography book and try some of the techniques in your digital darkroom. Got a tip to share? Guestbook |